How to Collect Wedding Photos from Guests Without an App

How to Collect Wedding Photos from Guests Without an App
If you want to gather wedding photos from your guests without asking them to download an app, here’s how to make it simple and effective:
- Use QR Codes: Create and display QR codes at key spots like tables, bars, and entrances. Guests scan the code to upload photos directly via a browser - no apps or accounts needed.
- Email or Direct Links: Send a post-event email with a link to a shared folder or upload form. This works best as a follow-up option.
- Cloud Storage: Platforms like Google Drive or iCloud allow guests to upload high-quality photos. Use shared folders or forms to simplify the process.
- Physical Media: Provide disposable cameras or set up a USB transfer station for offline photo collection.
Key Tip: QR codes have the highest participation rates (90%+) compared to email or apps. Combining methods ensures you don’t miss any moments. Keep privacy in mind by using secure links and upload-only permissions.
Below, we’ll break down these methods with tips to make them easy for everyone.
The Best Way to Collect Wedding Photos from Guests - No App Needed!
Using QR Codes to Collect Photos
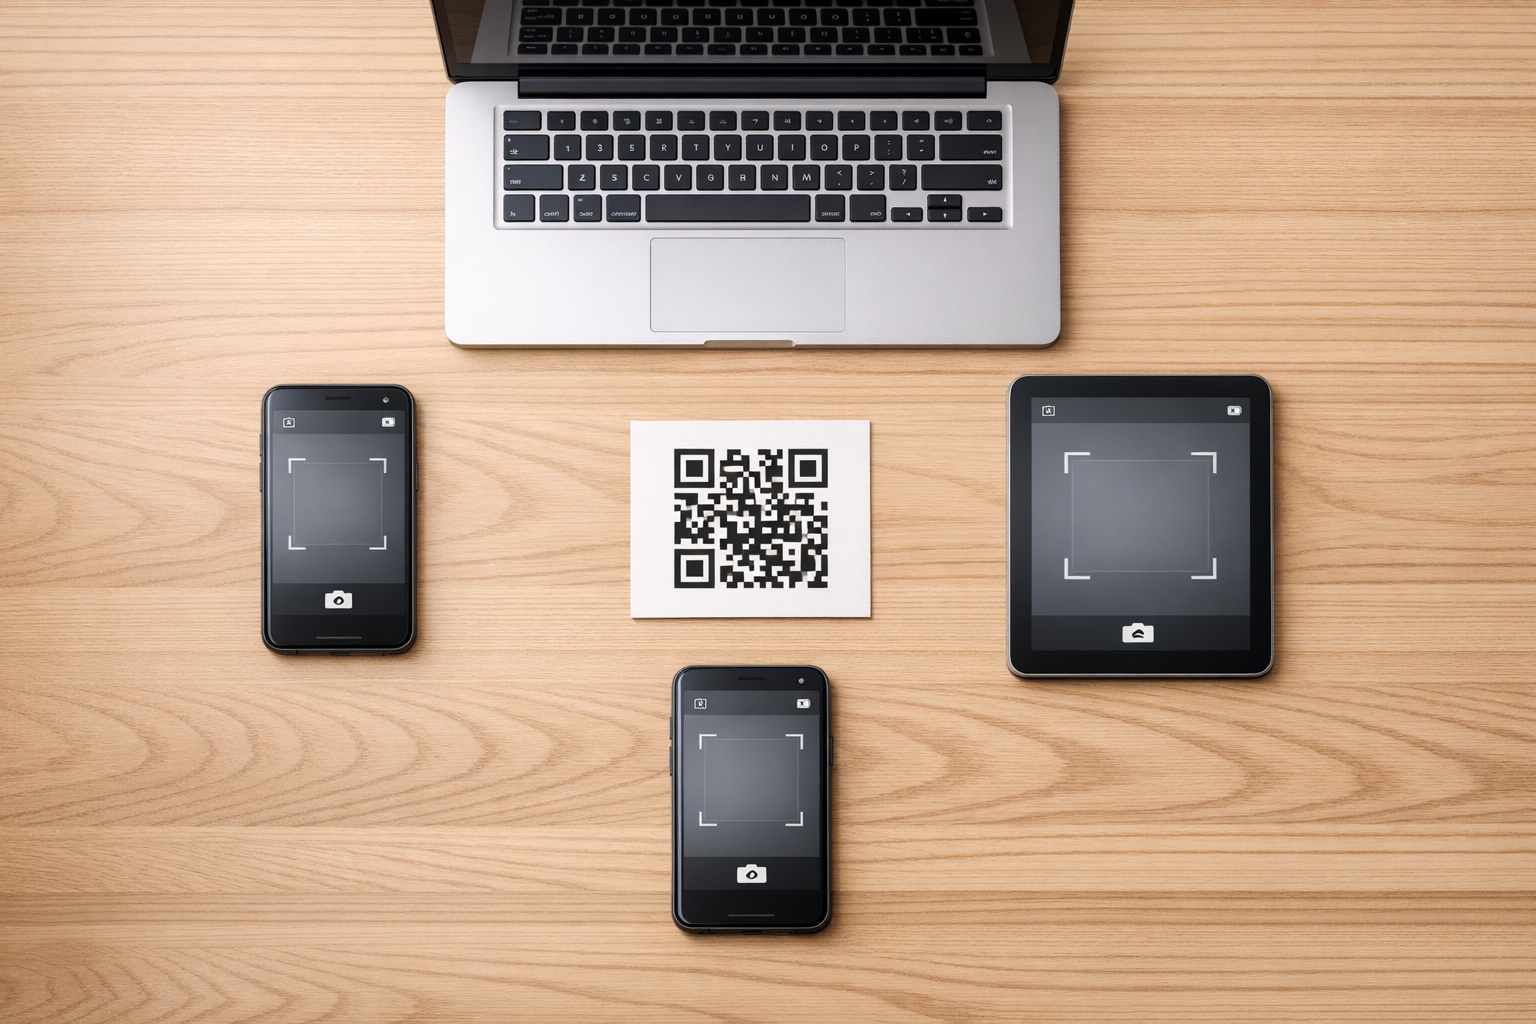
QR codes make photo sharing incredibly simple by removing the need for guests to download apps or create accounts. When guests scan the QR code using their smartphone camera, it takes them straight to a web-based upload page in their browser. From there, they can easily select and upload photos from their camera roll.
How QR Codes Work for Photo Uploads
Here’s how it works: you create a unique QR code linked to a specific upload URL. When a guest scans the code, it opens the upload page in their browser - no app installation, sign-ins, or account setup required. Guests can then upload their photos directly to a storage platform of your choice, like Google Drive or a wedding photo-sharing site.
This process works seamlessly on any modern smartphone with a camera and internet access, making it easy for guests of all ages and tech skill levels. Saundi Pugh, Mother of the Bride, shared her experience:
"We made separate QR codes for the ladies getting ready so only they could access. We got so many pictures of the events from all perspectives!"
On average, a wedding with 80 guests can gather 300–600 photos through QR codes. For larger weddings with over 150 guests, you might collect 600–1,200 or more photos.
Where to Display QR Codes at Your Wedding
Placement is key to maximizing participation. Focus on areas where guests are likely to have downtime or are stationary. For example, the bar is an ideal spot since guests often wait there for drinks. Table centerpieces and menu cards also work well during dinner when there’s a natural lull between activities.
Other effective locations include:
- Welcome signs at the venue entrance to introduce the idea of photo sharing.
- Bathroom mirrors with fun messages like "Looking beautiful! Share a photo!"
- Wedding favor tags to remind guests to upload their pictures.
- Exit displays for a "last chance" upload opportunity as guests leave.
For even better results, ask your MC or DJ to make a quick announcement during dinner, explaining how to use the QR codes. This ensures everyone knows how to participate, even if they miss the printed signs.
Protecting Privacy with QR Code Uploads
Unlike public wedding hashtags that post photos to social media, QR code uploads are entirely private. The upload page is accessible only through the unique link embedded in the QR code, keeping it hidden from search engines and the general public.
If you’re using cloud storage like Google Drive or Dropbox, adjust the settings so that guests can upload photos without being able to view, download, or delete other images. Set permissions to "anyone with the link can upload" to maintain control. Some platforms even allow you to password-protect the upload page or disable guest viewing entirely, ensuring only authorized access.
Before the big day, test your QR code on different phone models and browsers to confirm it works smoothly. You can also create separate QR codes for different parts of the event - like the rehearsal dinner, ceremony, and reception - to keep photos organized and manage access more effectively.
This private, app-free approach makes photo collection effortless and sets the stage for exploring additional methods in the next section.
Collecting Photos Through Email and Direct Links
While QR codes make sharing photos during the event a breeze, email and direct links provide a convenient way to collect memories afterward.
Using email or direct web links is a straightforward and familiar option for gathering wedding photos. Guests don’t need to download an app or create an account, which makes it a hassle-free choice. However, this method typically sees a response rate of under 10%, so it works best as a follow-up or for smaller weddings. Like QR codes and cloud-based solutions, this approach ensures that all those special moments are preserved.
The biggest perk? Simplicity. Guests receive a link in their inbox that takes them directly to a browser-based photo hub. No extra steps, no headaches. As Eventoly aptly puts it:
The moment Aunt Carol has to download an app or create a password, you've lost her.
Writing Clear Photo Submission Requests
To encourage participation, your email should be warm, inviting, and easy to understand. Start with an engaging subject line like, "Help us relive the magic!" Then, thank your guests for attending and clearly explain what you’re asking them to do. Highlight that no app or signup is required - this reassurance can make all the difference, especially for less tech-savvy guests.
You might also add a personal touch by explaining how their candid photos capture moments you may have missed. For example, mention how their snapshots might include your grandmother’s emotional smile during the vows or an impromptu dance-off among your friends.
Make sure to include just one direct link to your centralized photo hub. Keeping it simple helps avoid confusion. Wrap up the email with a warm, heartfelt sign-off that reflects your personality.
Once the requests are sent, the next step is managing the incoming photos effectively.
Organizing Photos from Multiple Guests
Start by sorting through the submissions within the first week. Eliminate blurry or duplicate images, then organize the remaining photos into chronological albums such as "Getting Ready", "Ceremony", "Family & Group Shots", and "Dance Floor."
For better organization, create a master album that contains all the photos for your personal archive. You can also set up smaller, curated galleries for specific groups - like one for your wedding party and another for extended family. This way, you can share the right photos with the right people while keeping everything neat and manageable.
Using Cloud Storage for Photo Collection
Cloud storage platforms like Google Drive, Dropbox, and iCloud offer a simple, app-free way to gather and organize wedding photos. These services are familiar to most people, making it easy for guests to contribute their pictures.
Google Drive is a standout option, offering 15 GB of free storage - enough for hundreds of high-resolution images. As Canvas & Bear explains:
Google Drive stores files at their original quality. This makes it perfect for archiving high-resolution images.
Dropbox, while reliable, only includes 2 GB of free storage, which might work better for smaller gatherings. If most of your guests use iPhones, iCloud Shared Albums is another great choice. It can hold up to 5,000 photos and videos, though it’s less convenient for non-Apple users.
One challenge with Google Drive is that guests typically need a Google account to upload files directly. A simple workaround is creating a Google Form with a file upload field, allowing anyone with the link to submit photos without needing an account.
Creating a Shared Album
Start by setting up a shared album on your chosen platform. For Google Drive, create a folder specifically for your wedding and adjust the sharing settings to "Anyone with the link" as Editor. If some guests don’t have Google accounts, using a Google Form simplifies the process.
If you prefer Google Photos, create a new album via the app or web interface. Once it’s ready, click "Share" and generate a link. You can distribute this link through text messages, emails, or even turn it into a QR code to display at your reception.
For iCloud, enable "Shared Albums" in your iPhone settings. Create a new shared album in the Photos app and invite guests via email or contacts. If you have non-Apple users attending, activate the "Public Website" option in the album’s "People" tab to create a web link they can access.
To keep things organized, consider using a dedicated Gmail account for your wedding photos. This ensures you can fully utilize the 15 GB of free storage without mixing personal files. You can also create subfolders within your main folder, such as "Ceremony", "Reception", and "Speeches", to make browsing easier later on.
Managing Storage Space and Access
Before the wedding, check your storage quota. Since videos take up significantly more space than photos, you might want to ask guests to focus on still images if storage is tight.
Encourage guests to upload only their best photos - perhaps limiting submissions to 30 per person. Setting a clear deadline, like "Please upload your photos by [specific date]", can help ensure timely participation.
Keep an eye on the folder to delete duplicates, blurry images, or accidental shots. With iCloud Shared Albums, the album owner can remove any photo or comment, while guests can only delete their own contributions.
If your storage fills up, consider downloading photos to an external hard drive to free up space. For larger weddings with extensive video content, upgrading to a paid plan (like Google One) before the event can help avoid running out of storage at a critical moment.
Physical Media Options for Photo Collection
Physical media like disposable cameras and USB drives offer a practical, offline way to gather guest photos, especially for venues where internet access is unreliable.
Disposable and Instant Cameras
Placing disposable or instant cameras on reception tables can add a nostalgic touch while encouraging guests to snap candid moments. These cameras often capture unique memories - like a flower girl napping in the corner or an unexpected dance-off - that might otherwise go unnoticed.
A big plus is their simplicity. They don’t rely on WiFi or smartphones, making them perfect for venues with poor connectivity or for older guests who prefer straightforward options. To maximize their use, you could place cameras on every table, at the bar, or next to the guest book.
That said, there are some downsides. Disposable cameras can get expensive when you factor in both the purchase price and film development costs. The quality of the photos can also be hit-or-miss, with some images coming out blurry. Plus, developing the film takes time - sometimes weeks - and there’s always the chance that a camera might go missing unless you have a clear plan for collecting them at the end of the event.
For guests who prefer digital photography, USB drives offer another way to gather high-quality images.
Collecting Photos on USB Drives
USB drives are a simple option for collecting high-resolution photos from guests using digital cameras. Setting up a photo-sharing station with a laptop and card reader lets guests transfer their images directly onto a USB drive during the reception.
This method is especially helpful for guests who aren’t comfortable with cloud storage. It provides a secure, offline backup while ensuring you retain full control of your photos. To avoid losing or mixing up USB drives, consider having a central drop-off point - like a tech station or a spot near the guest book - and clearly label each drive.
However, USB drives don’t allow for instant sharing or viewing, which makes them better suited as a backup option rather than your main photo collection method.
Privacy and Security Considerations
When gathering wedding photos from your guests, keeping their privacy intact and ensuring the security of your images should be at the forefront of your planning. The tools and platforms you choose play a big role in determining how much control you have over access and storage.
Protecting Guest Data
One way to safeguard guest privacy is by using platforms that don’t require personal details for photo uploads. Look for services that allow contributions without needing an account or email address - this reduces the amount of personal information collected.
For added security, consider cloud solutions that upload files directly to your own Google Drive. This ensures you maintain full ownership of the data. When signing in, stick to reliable external browsers like Safari or Chrome for a secure connection.
If Instagram is your platform of choice, create a private account specifically for the event. This lets you manually approve follow requests, giving you control over who can view and contribute photos.
While guest privacy is critical, managing access to the photos themselves is just as important.
Controlling Photo Access
Opt for platforms that generate unique, non-searchable links instead of public galleries. Some modern QR code systems create private galleries accessible only through a specific link or code, keeping them out of search engine results.
Look for services that offer moderation tools. These features let you approve uploads, control who can view or edit photos, and even remove unwanted images before they go live. Many platforms also allow you to set time-limited upload windows - typically between 3 to 12 months - after which the gallery automatically locks.
If you’re using physical media like disposable cameras or USB drives, there’s always a risk of them getting lost at the venue. To prevent this, set up a secure collection point and assign a trusted person to gather them before the event wraps up.
Comparing Photo Collection Methods
Each method for gathering wedding photos comes with its own set of pros and cons, making it easier to find one that matches your specific needs. Here's a quick rundown of how these options stack up in terms of ease, cost, and overall success.
QR codes are by far the easiest option for guests. No apps, no accounts - just scan and upload on the spot. Dylan Eirinberg from POV sums it up well:
If guests have to download an app, sign up or manage file sharing mid-champagne-toast, you'll likely have lower guest participation.
However, some QR code platforms charge a small fee, though there are free options available.
Email requests might not cost anything, but they’re usually not effective. On average, only about 5% of guests actually take the time to send photos via email. People often forget, get sidetracked, or just don’t make it a priority after the event.
Cloud storage tools like Google Drive give you 15GB of free storage and maintain the original quality of photos. The downside? Guests need to set up an account, which can discourage participation.
Physical media, like disposable cameras, are a good choice for guests who aren’t comfortable with technology. But don’t expect high-quality images - these cameras often produce grainy or blurry photos compared to smartphones.
Comparison Table
Here’s a quick snapshot of how each method compares across key factors:
| Method | Ease of Use (Guest) | Cost | Participation Rate | Photo Quality | Privacy |
|---|---|---|---|---|---|
| QR Codes | High (No app needed) | Low to Moderate | High | Original/High | High (private) |
| Cloud Storage | Moderate (requires account) | Free to Low | Moderate | Original/High | High |
| Email/Links | Low (requires follow-up) | Free | Very Low (<10%) | High | High |
| Physical Media | High (no tech needed) | High | Moderate | Low (grainy) | High |
| Social Media | High (familiar platforms) | Free | Moderate | Low (compressed) | Low (public) |
To put things into perspective, a wedding with around 80 guests could result in 300–600 photos, while a larger gathering of 150+ guests might produce over 1,200 photos. On the other hand, wedding apps that require downloads typically see participation rates of just 15–25%.
This comparison can help you choose an approach that fits your wedding’s vibe while keeping things stress-free for your guests.
Tips for Successful Photo Collection
Getting Guests to Participate
Getting your guests involved is essential to collecting a treasure trove of memories. Since this approach doesn’t rely on an app, these tips make it easy for everyone to join in.
First, make sure to strategically place reminders in high-traffic areas, as mentioned earlier. These gentle nudges throughout the event help keep photo sharing top of mind.
Another great strategy is to have your MC or DJ make an announcement during dinner. For instance, they could mention how the evening is packed with unforgettable moments and invite guests to contribute by scanning the QR code on their table. The no-app-required process makes it quick and simple for everyone, and a clear call-to-action can encourage more uploads.
Want to make it even more engaging? Turn photo sharing into a game! Try a "Photo Scavenger Hunt" with fun challenges like snapping a picture of a toast with someone from a different table or finding the guest with the most stylish tie. You could also host a "Photo of the Night" contest, offering a small prize - like a bottle of wine - for the best candid shot. To make things run smoothly, assign a tech-savvy "Photo Captain" who can assist guests who might need a little extra help.
These creative ideas can spark enthusiasm and ensure plenty of photos are collected by the end of the night.
Timing and Follow-Up
Keeping the momentum going after the event is just as important as engaging guests during it.
During the reception, consider displaying a live slideshow of the photos guests upload. Seeing their pictures pop up in real time is not only exciting but also inspires others to join in and share their moments.
After the wedding, follow up with a heartfelt thank-you message that includes the upload link. For example, you could say, "Thank you so much for celebrating with us! If you captured any special moments, we’d love to see them." This warm approach encourages guests to share photos they may have forgotten about during the event. About a week later, send out the full gallery, including professional shots. Often, seeing the curated collection will prompt guests to contribute any additional photos they have. For an extra touch, you could include a small card with the QR code in your physical thank-you notes once you’re back from your honeymoon.
These steps ensure you don’t miss out on any of the wonderful memories your guests captured.
Conclusion: Choosing the Right Method for Your Wedding
When it comes to gathering wedding photos from your guests, there's no need for a specialized app. By weighing options like QR codes, email links, cloud storage, or physical media, you can pick the approach that best matches your wedding's size, guest list, and privacy preferences. For example, QR codes stand out for their ease of use, allowing guests to upload photos instantly - no downloads or accounts required - making them a great choice for events of any size. On the other hand, smaller, tech-savvy groups might lean toward shared cloud storage platforms like Google Photos or iCloud.
Privacy is another key factor. Public hashtags may seem tempting but often result in reduced image quality and less control over who sees your photos. Instead, private QR code platforms or cloud folders offer secure alternatives, ensuring only invited guests can access your gallery. This added layer of privacy is especially important when considering the diverse dynamics of weddings.
Don't forget to account for your venue's connectivity. If cell service is unreliable, disposable cameras can provide a simple, offline solution.
The goal is to strike a balance between convenience, photo quality, and privacy. App-free QR code systems consistently lead to higher guest participation compared to email requests. Choose the method that makes it easy for guests to contribute while keeping your memories secure and high-quality.